Continuous Delivery with Drone
Continuous Delivery should be a solved issue: the practice is well-defined and there is a plethora of tools implementing it with more or less peculiarities, but still many struggle implementing it. The dream of a perfect continuous deployment flow from the developer to the production environment with software quality gates based on automated tests is still alive in me, I tried and tried several times with multiple implementations on multiple platforms and never got to the point where I could say: “I’m done, this works exactly as I wanted”.
So I stumbled on drone and decided to give it a go: it’s an open-source project, written in Go and with a SaaS offering via their website. The concept I like is that every step of the build/deployment process runs through a container and this is very close to my idea of a modern CD tool, a platform where I can compose pipelines by chaining containers execution on a shared workspace. Love it already.
Installing the stack
You can run the drone server and agent locally on your laptop with docker-compose as detailed here. Only issue is: for integrating with any of the big Git cloud provider (Github and Gitlab) you will need to expose your service to the internet, so I’ll use a local instance of gogs running in a docker container from the official image. All I need is in the docker-compose.yml file: I added just a couple of volumes directive compared to the original one and I am using the docker-for-mac internal hostname to resolve the bridge IP internally as detailed here. This is a lab setup and having a production-ready installation will require database setup and filesystem persistence, but I don’t have this requirement now. After a docker-compose up -d my stack is ready.
Installing the CLI
As easy as following this guide. Once logged to the web UI I navigate to the ${DRONE_HOST}/account/token page where I can get a token to configure the CLI.
Adding secrets
There is a nice feature in drone: I can manage secrets directly from the command line and they can be scoped globally or be available only to one pipeline step (corresponding to an image). I will need to add Dockerhub username and password to the plugin/docker image to be able to push the image, so I add this 2 secrets with the following
drone secret add -repository=inge/goapp -image=plugins/docker -name=docker_username -value=inge4pres
drone secret add -repository=inge/goapp -image=plugins/docker -name=docker_password -value=***************
A sample pipeline
As many of the continuous delivery tools available on the market, drone uses a YAML configuration file in the root of the repository, so adding a .drone.yml hidden file is enough to start hooking every commit to the build system. I configured a 3 stages pipeline:
- test and build artifact
- publish the artifact
- deploy the application
It’s very simple to get started and the one-container-per-step architecture makes it trivial to glue together multiple steps. There is an implicit concept of shared workspace (configurable) that you can leverage to use Makefile and Dockerfile just as the build was happening on your local environment.
So I really recommend trying out drone and reporting some issues if you find any, for the time being I am very excited to have a CD product entirely written in Go - I think I will contribute to the project to have some enhancements available in the free version.
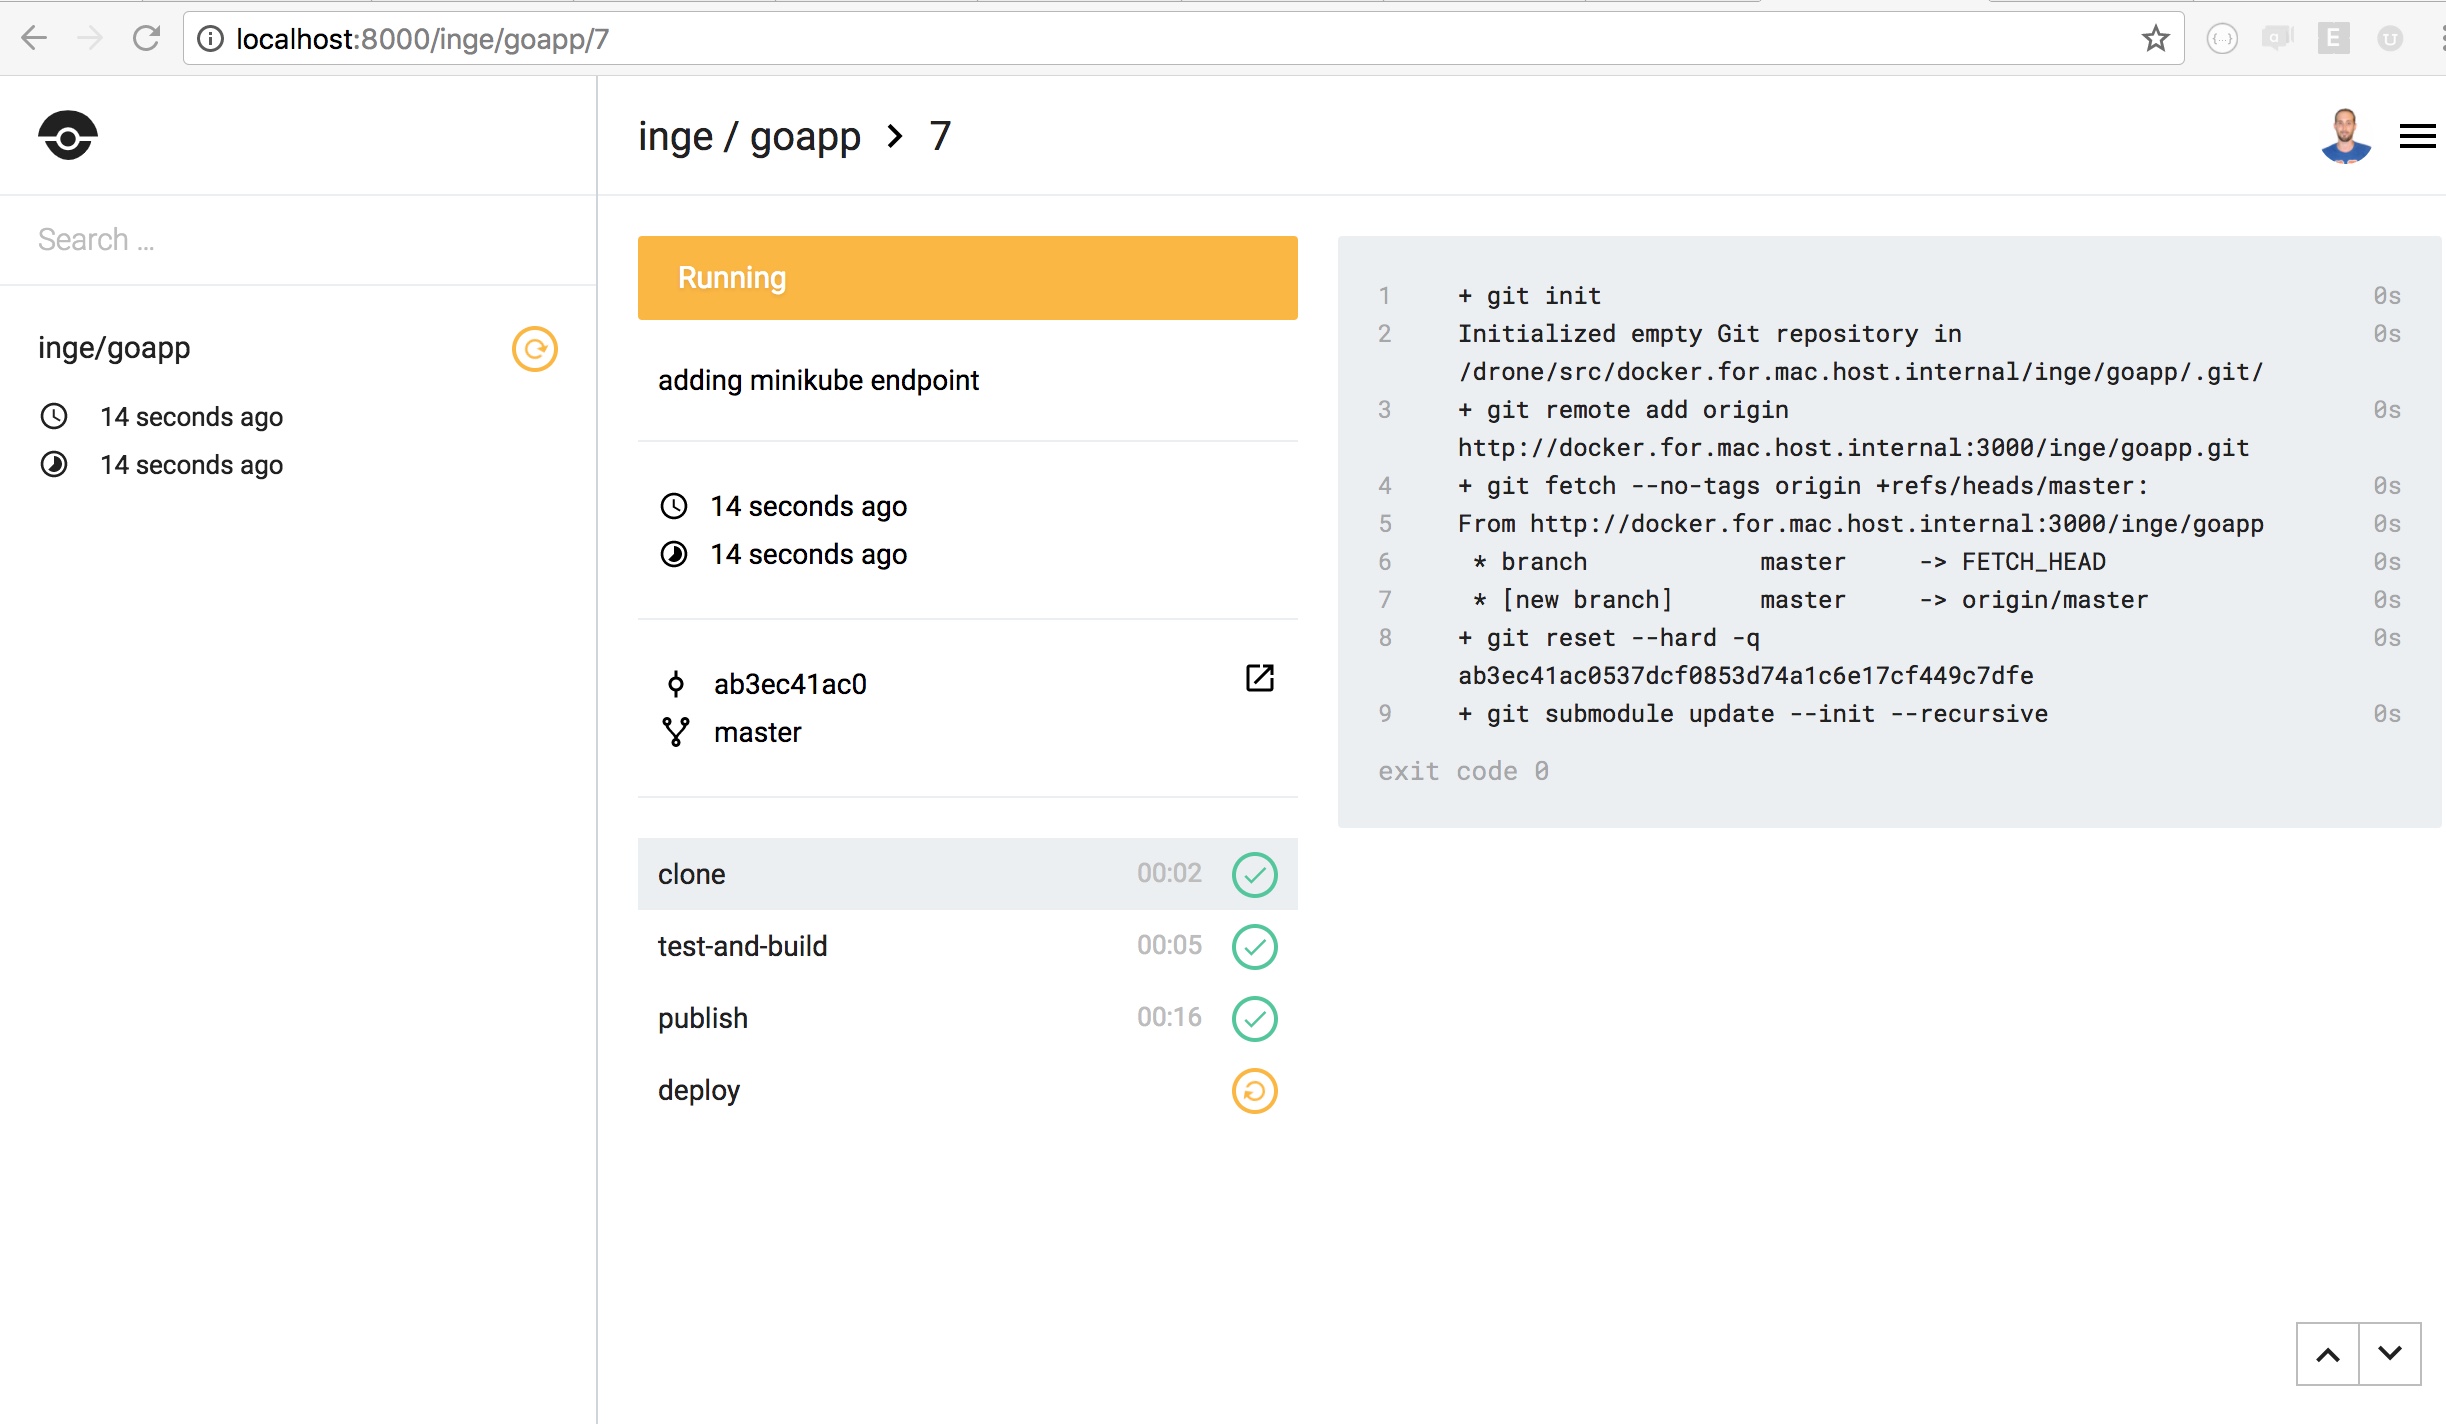
Below here some screenshots of the drone web UI and the pipeline resulting from the YAML config file: I will explore more complex workflows like promoted builds and gated builds - and build more in the tool if I need.
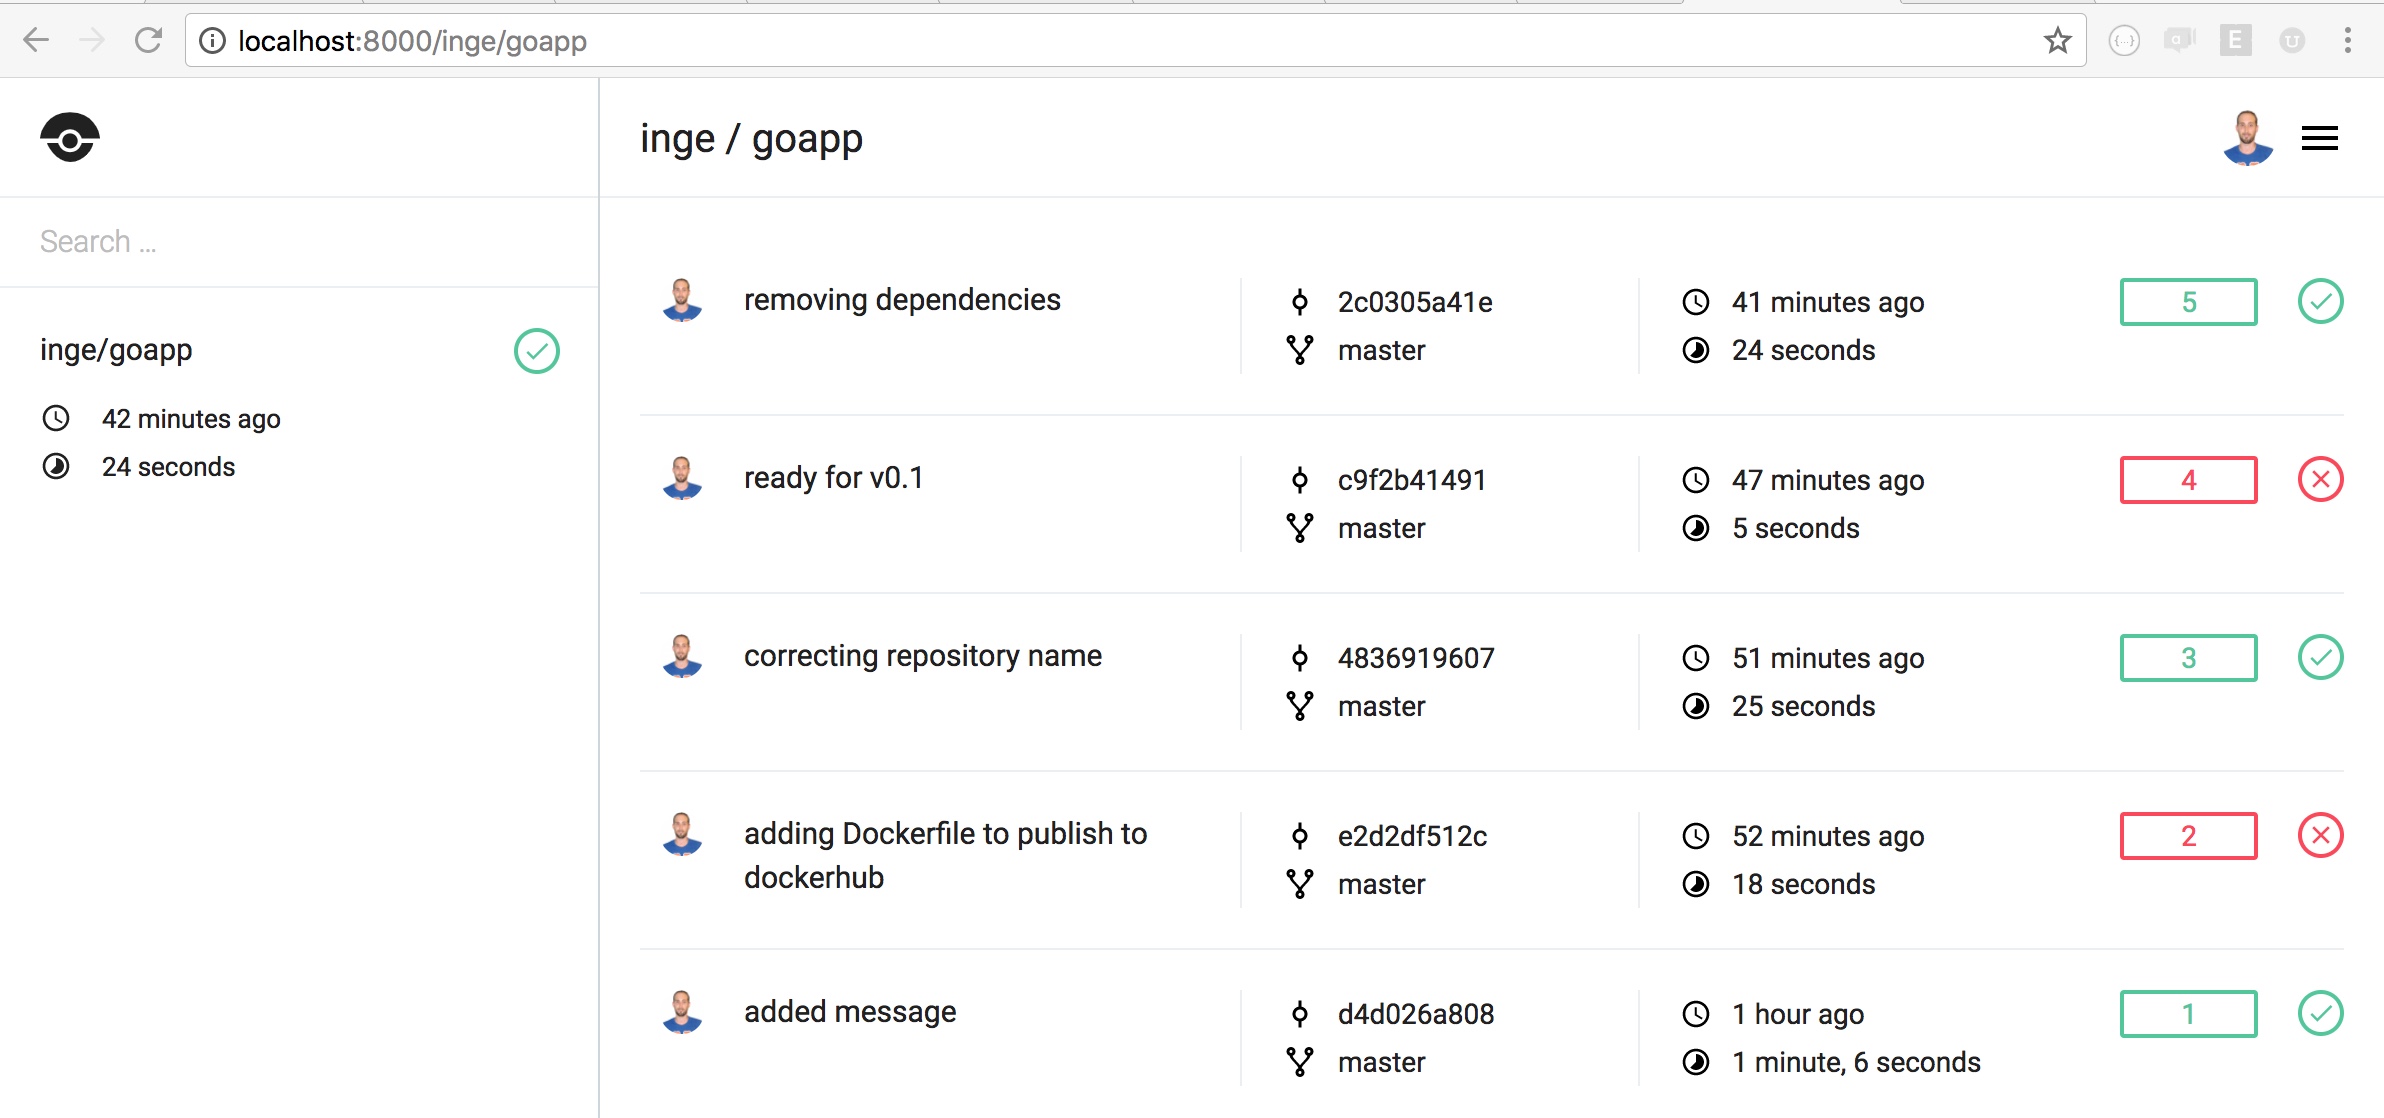
drone repository view
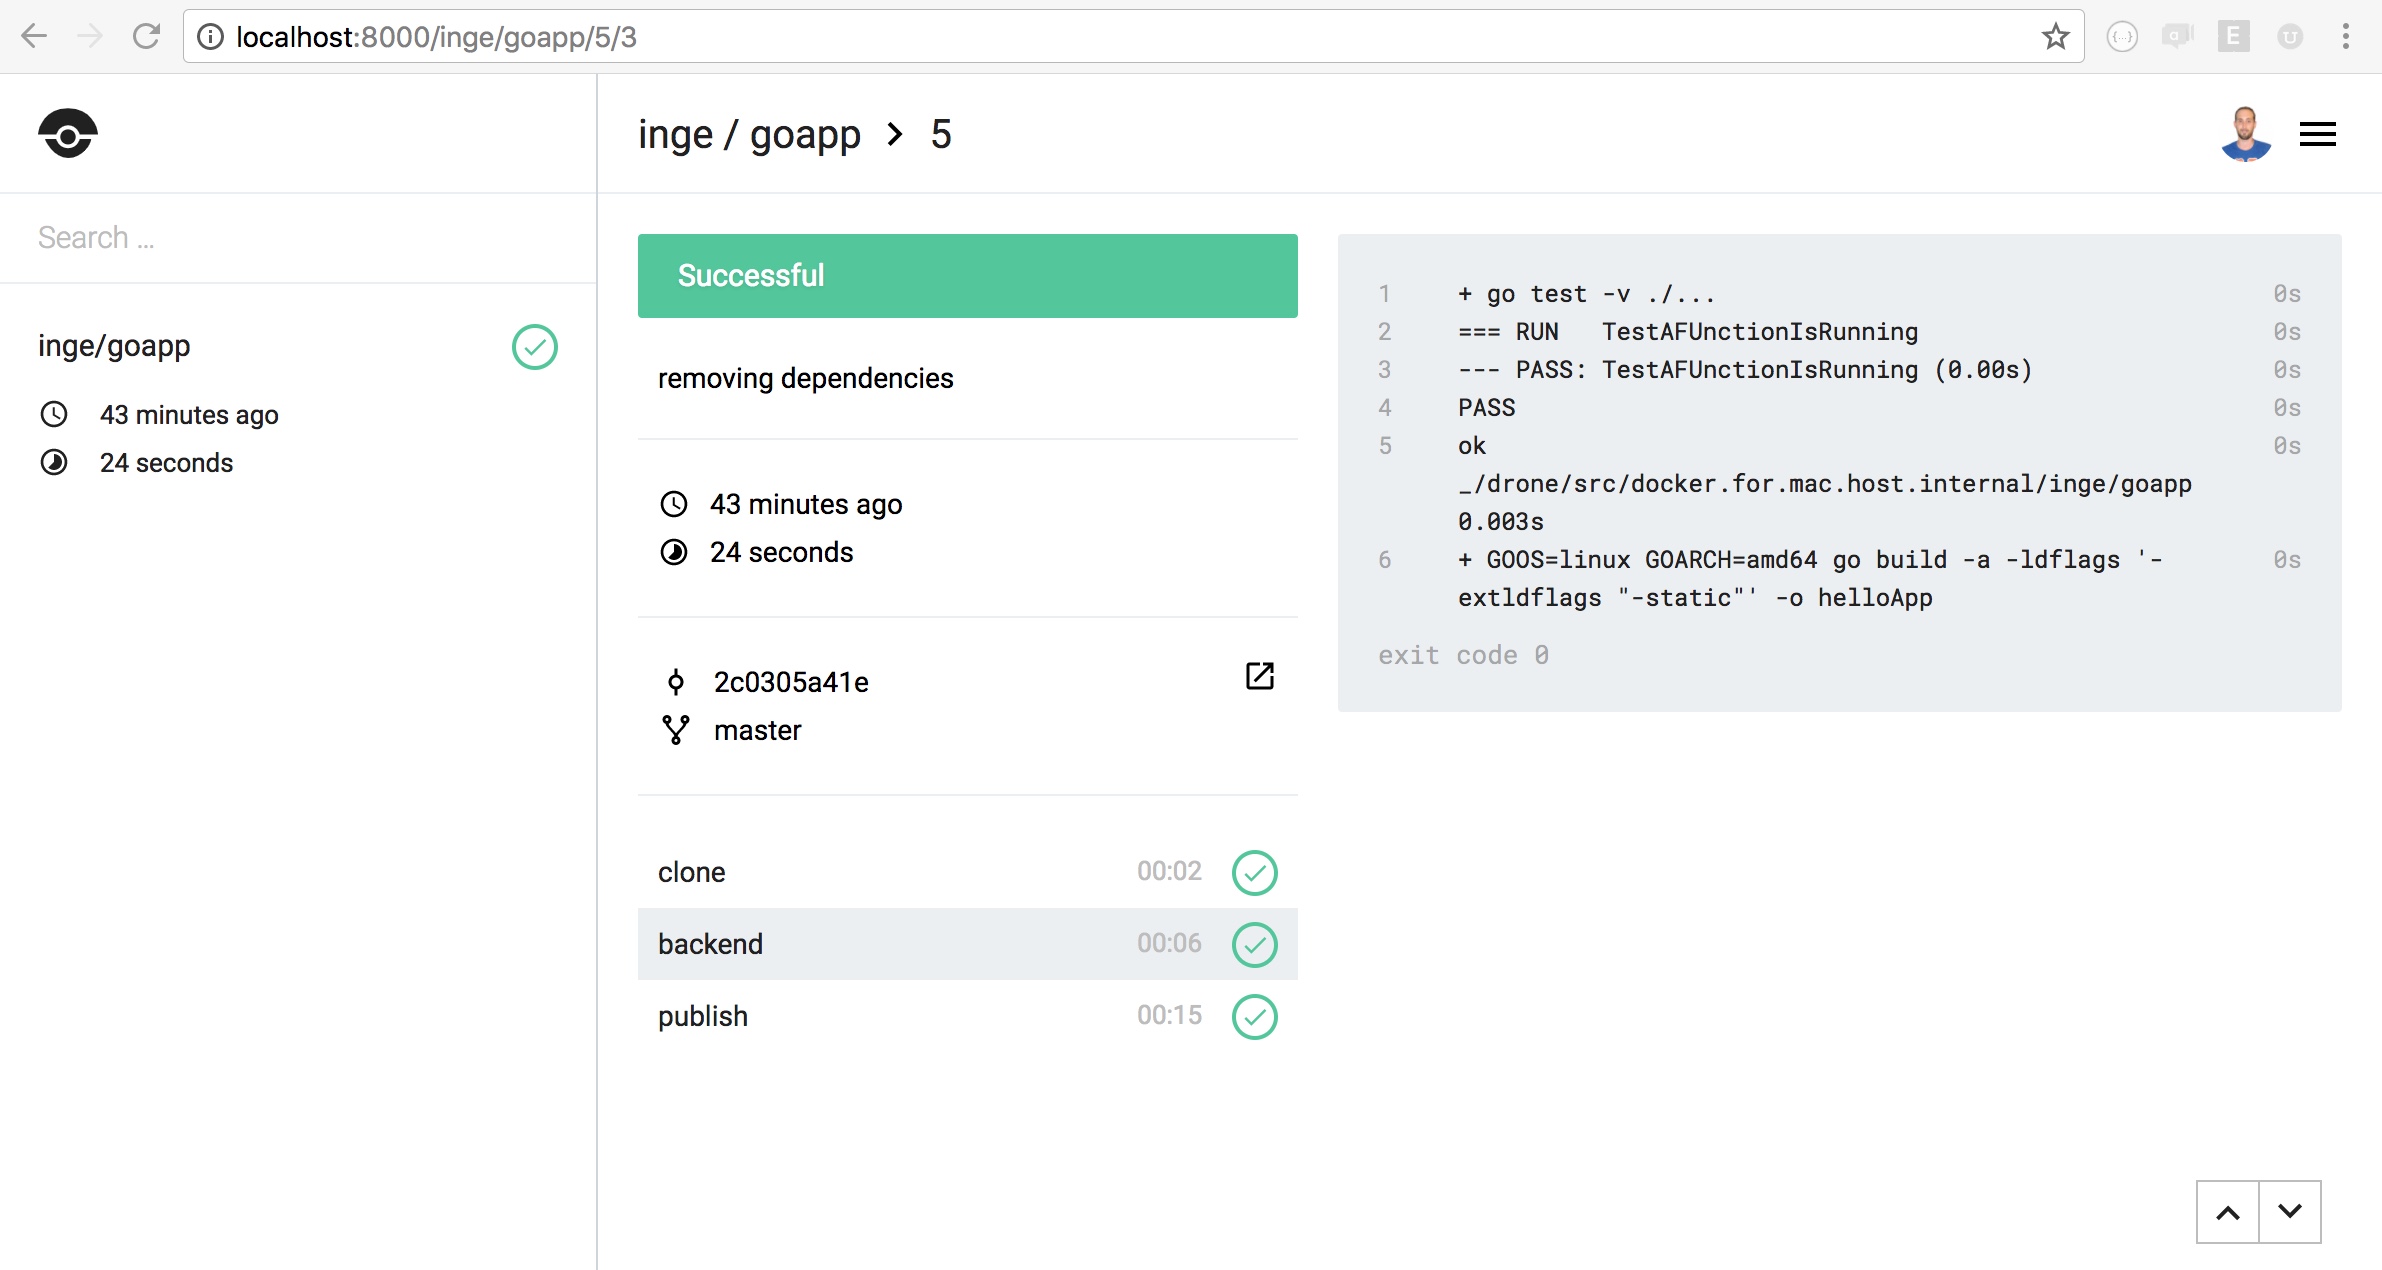
drone pipeline log
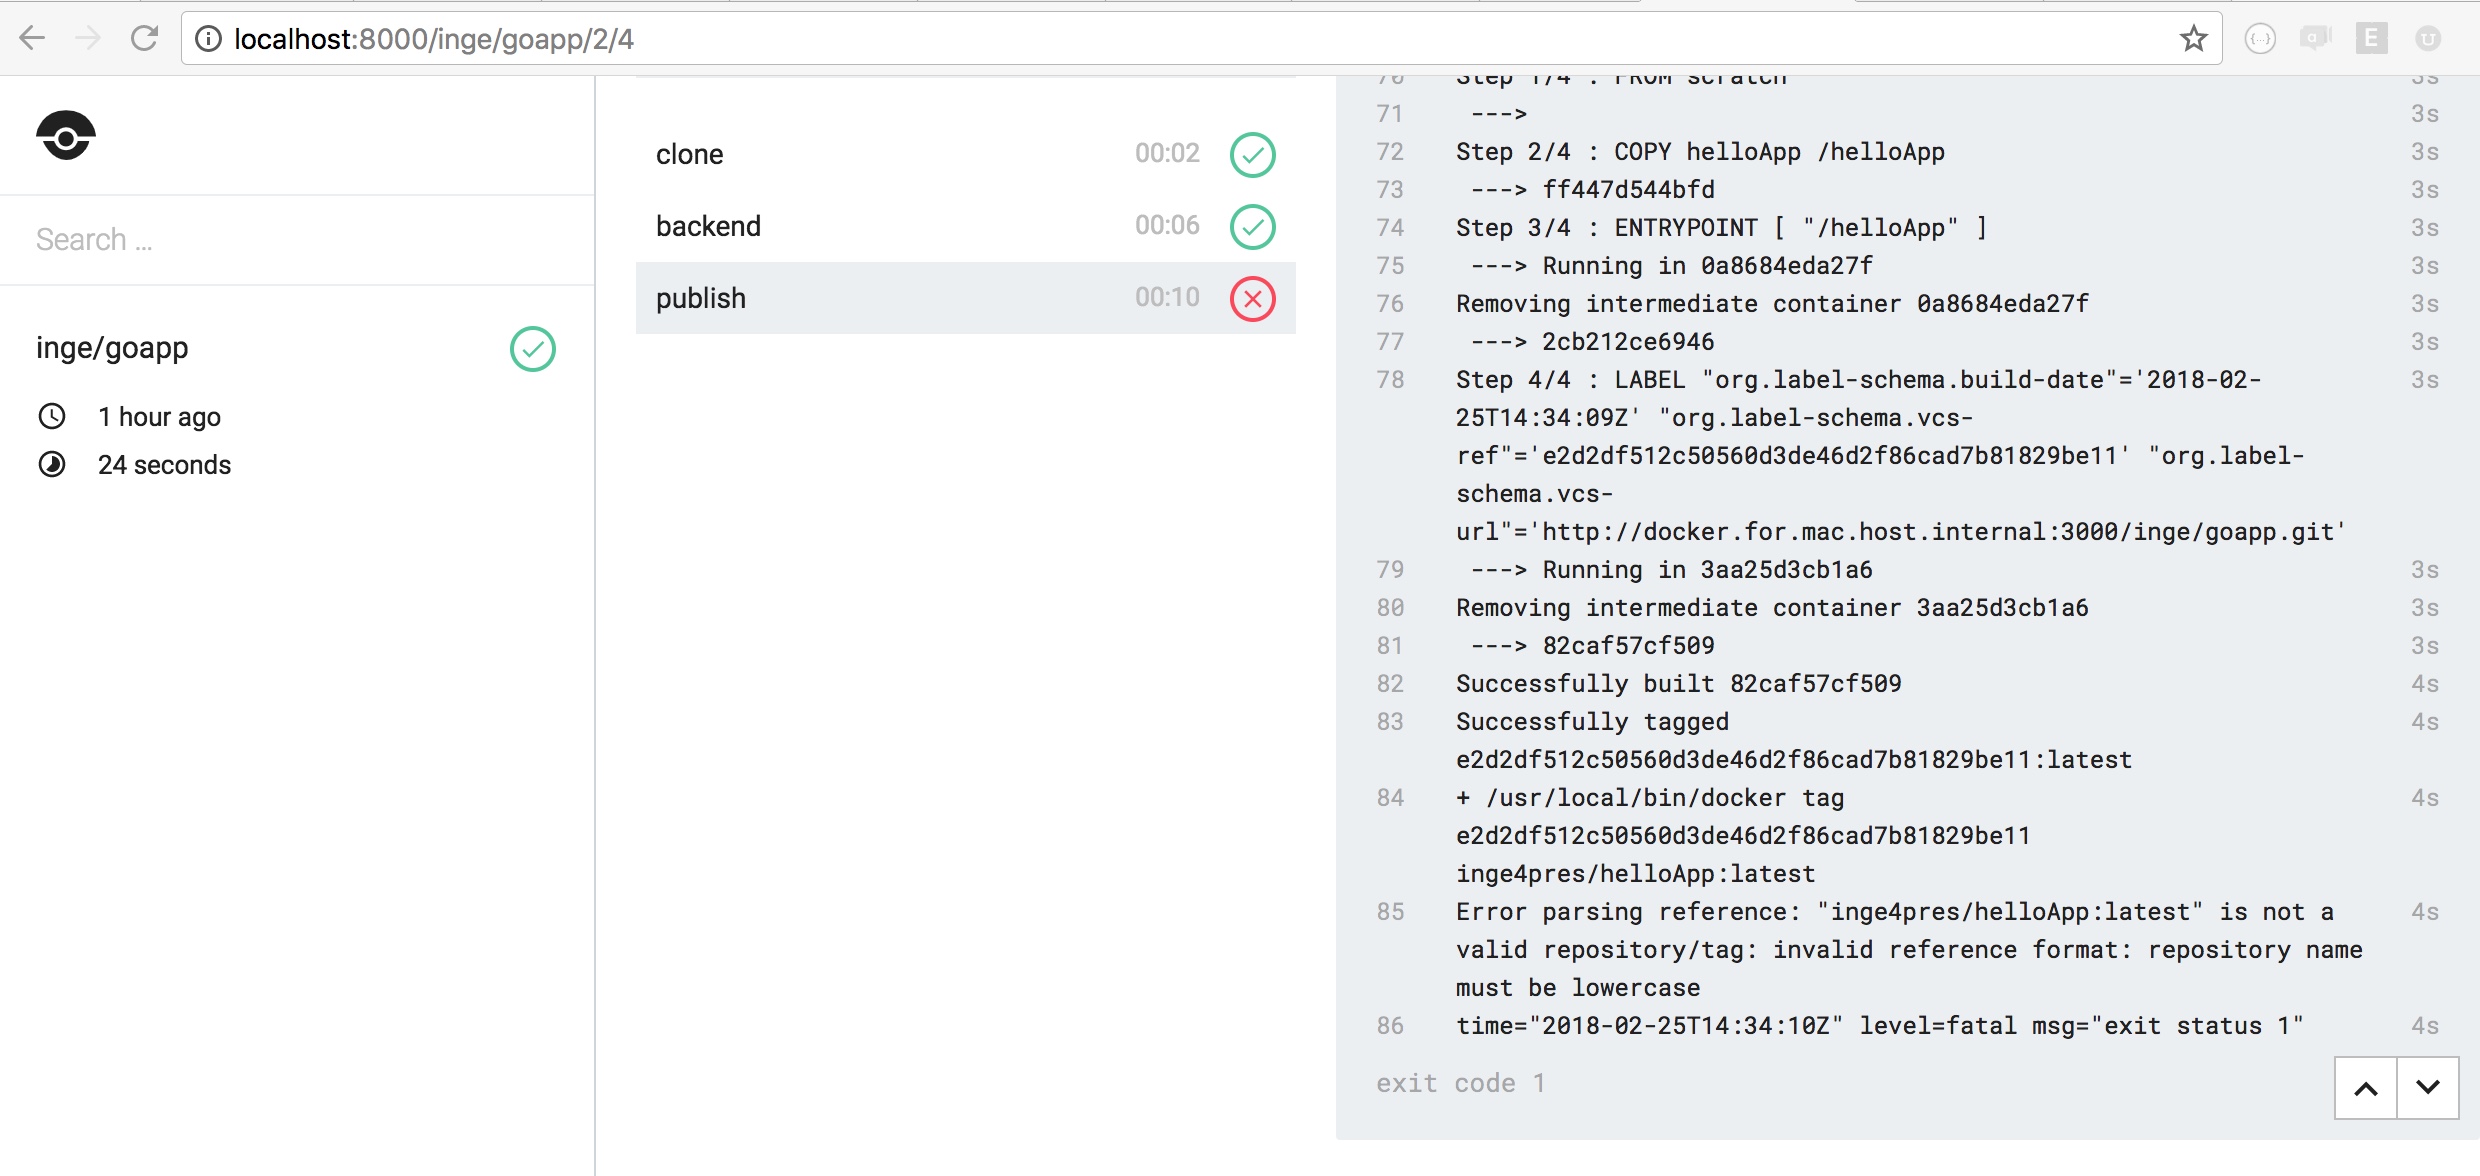
drone stage error